Battle in Balin's Tomb
Filed Under: Hobby
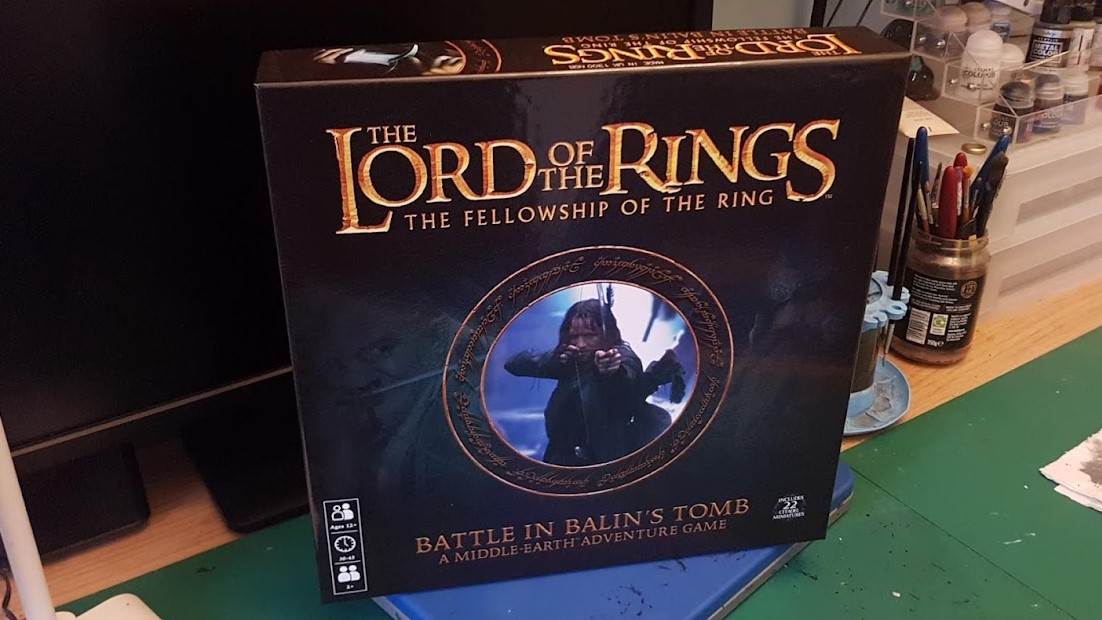
My final hobby project in 2021 was Battle in Balin’s Tomb, a self-contained boardgame that uses miniatures from Games Workshop’s Middle-Earth range, which Nat got me for Christmas. Thanks Nat!
It’s a small affair, containing the Fellowship, 12 Moria Goblins and a Cave Troll, all plastic. There’s a little booklet showing how to assemble the miniatures, a short rulebook and a one-sided game board, and that’s it!
All these models have existed since at least 2005, presumably created for a starter set for the LotR Strategy Battle Game, and they all look fantastic - simple and small but full of character. Some of the Fellowship even bear a striking resemblance to the actors, which is impressive given the scale.
Assembly
Assembling the miniatures was a breeze as most of them are one piece. You just clip them off the sprue, take a partially-successful stab at removing any mould lines, and then stick them to their bases. Those with more than one piece are also easy to assemble as all the models are OG examples of GW’s push-fit design, where one part has a peg and the other part has a slot for it to push into. You’ll probably want to use poly cement anyway but it’s nice that this set can be put together without the need for potentially-messy solvents.
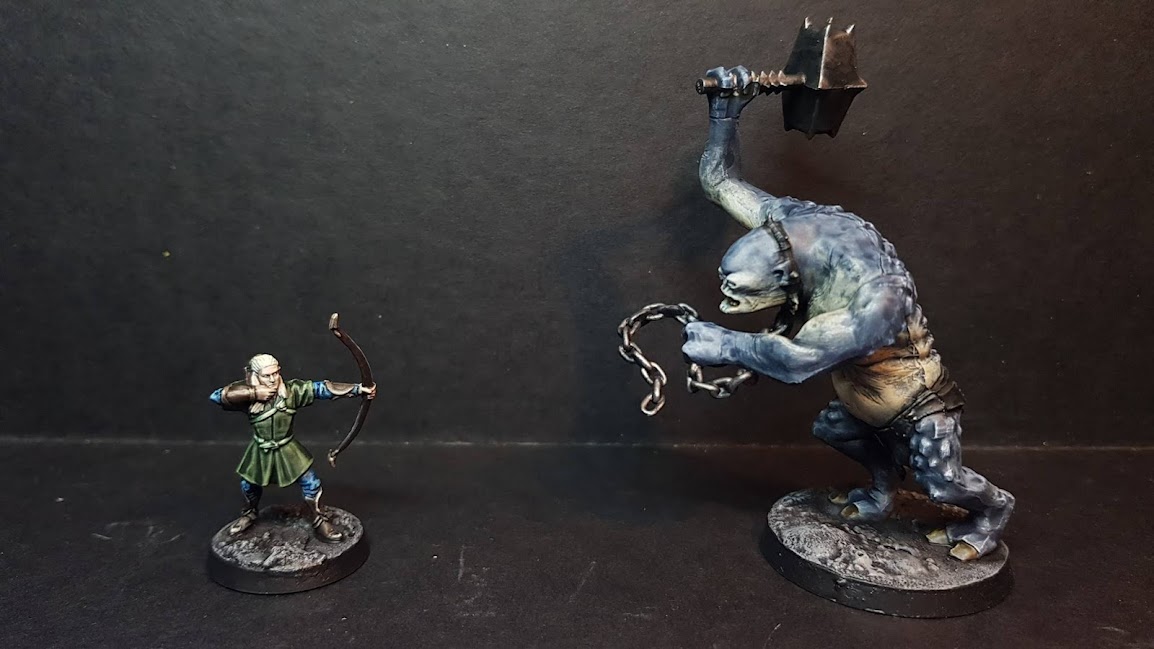
The most complicated assembly was the Cave Troll, who you even get a choice of weapon with. I ended up with a few gaps on the model and if I had gotten around to making some sprue goo, I’d have filled these gaps properly, but instead I just did my best to push the parts together tightly while the poly cement set and hoped that paint would make the gaps less noticeable.
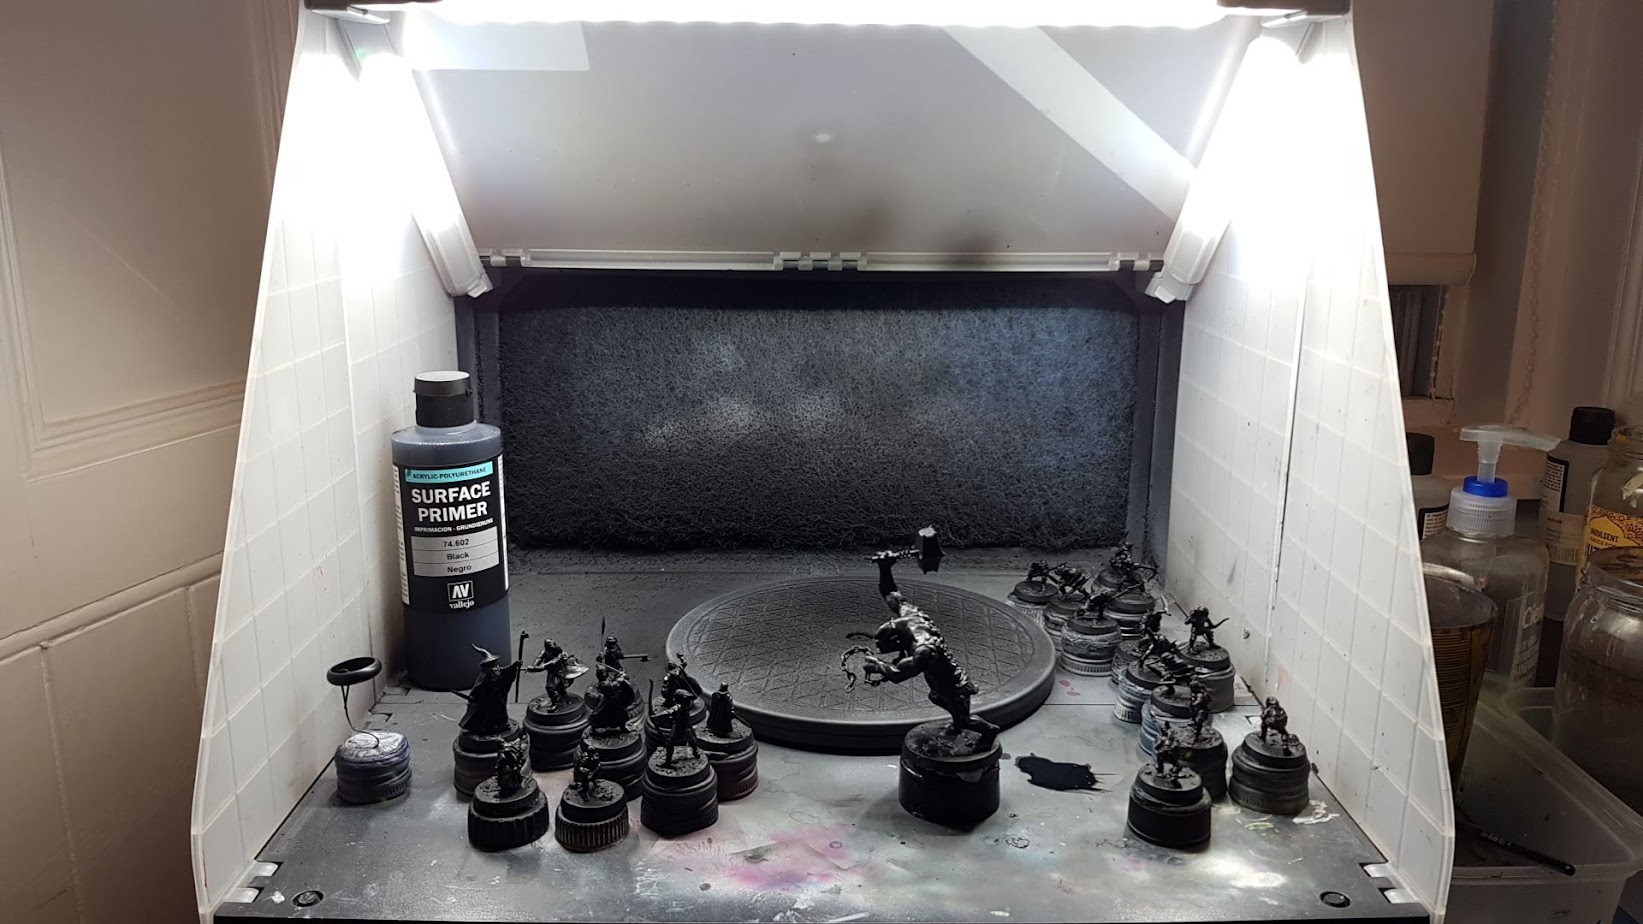
Once stuck to their bases - again, these are all slottas or, in the case of the Troll, peg-attached (peggas?) - I filled any gaps in the slots with milliput and then put down a light layer of my trusty custom basing mix1. Then they were ready to paint.
Painting
I followed the old tried-and-tested speed-painting method of pre-shading, first priming black:
Then airbrushing with lighter greys from higher angles and eventually white from above. With a little finesse you can make the brightest point on the model be the face, which really helps make the colours pop there and make it a focal point on the mini.
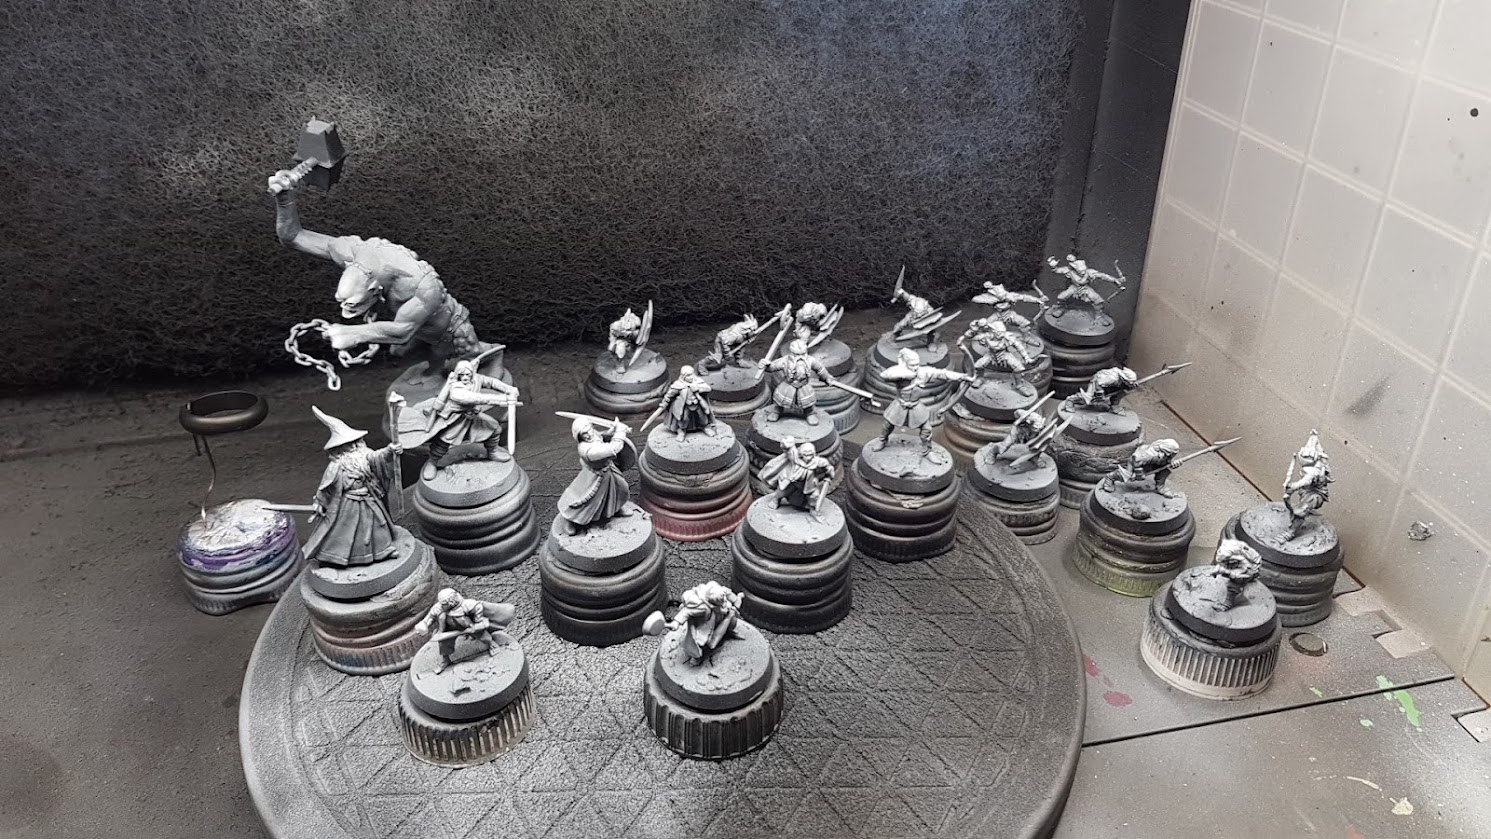
Next I gave all the minis a wash of Basilicanum Grey, avoiding areas I wanted to keep bright, followed by an all-over white drybrush. This drybrush step adds definition to all the edges on the model. Here is a goblin who’s finally ready for some colour:
If you’re not familiar with this approach to painting, you might be thinking: Gosh, this seems like a lot of steps before actually doing anything! And you’d be partially right. I find it really does help a lot later on to have a good pre-shade, even if you’re not going to paint with Contrast paints or use a similar tinting-based approach. It doesn’t even really take that long to do - it took me maybe an hour and thirty minutes total to get everything in the box from ‘built’ to ‘ready for colouring’. And you don’t need an airbrush (though it helps) - you can do all this with rattlecans.
I will admit, however, that part of the reason I spend time pre-shading is because it delays having to make any actual tricky decisions about colouring for as long as possible! I am just indecisive like that.
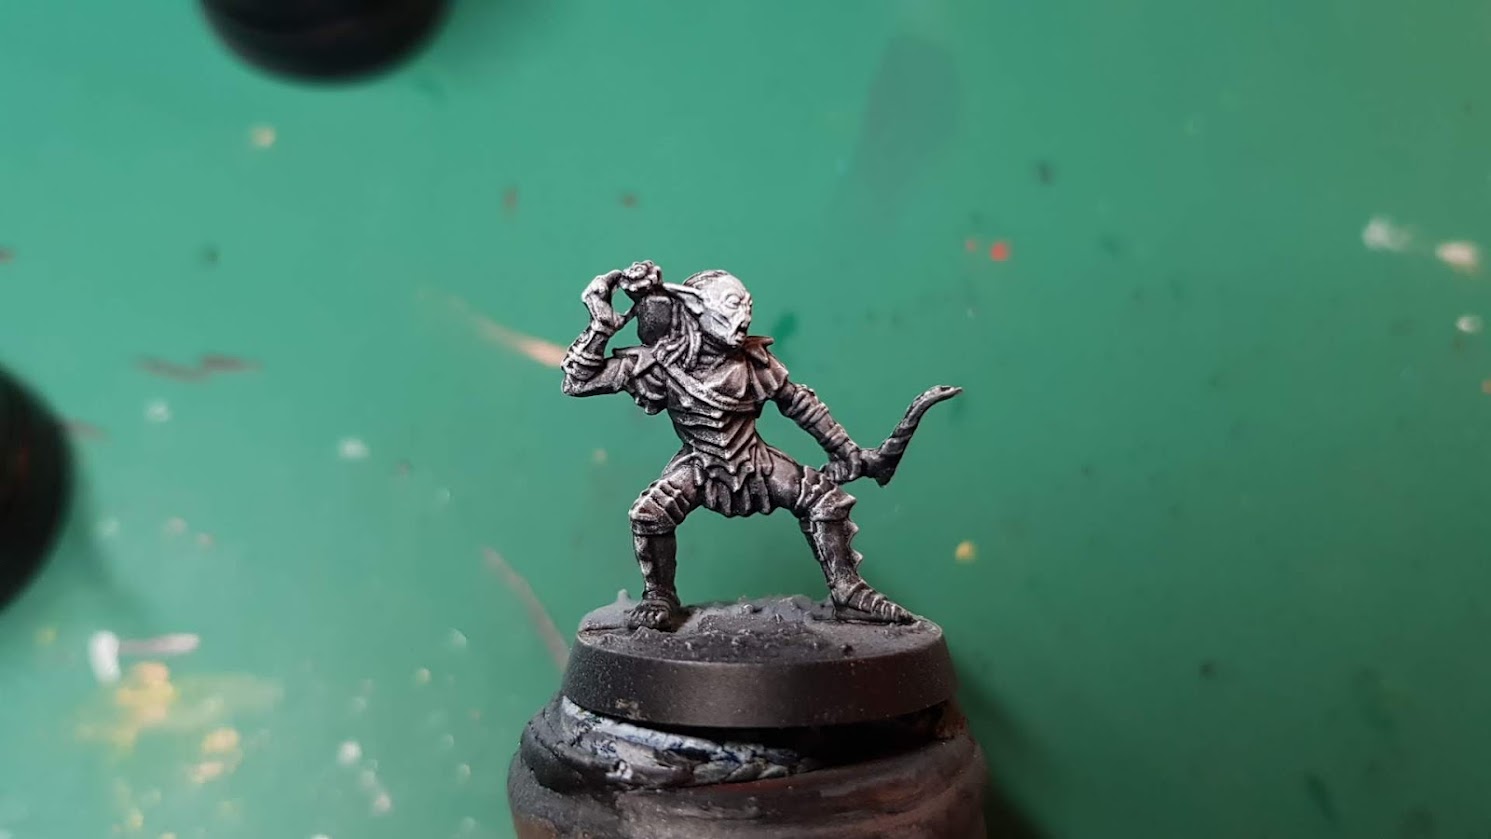
Here is a goblin after being coloured in with Contrast paints:
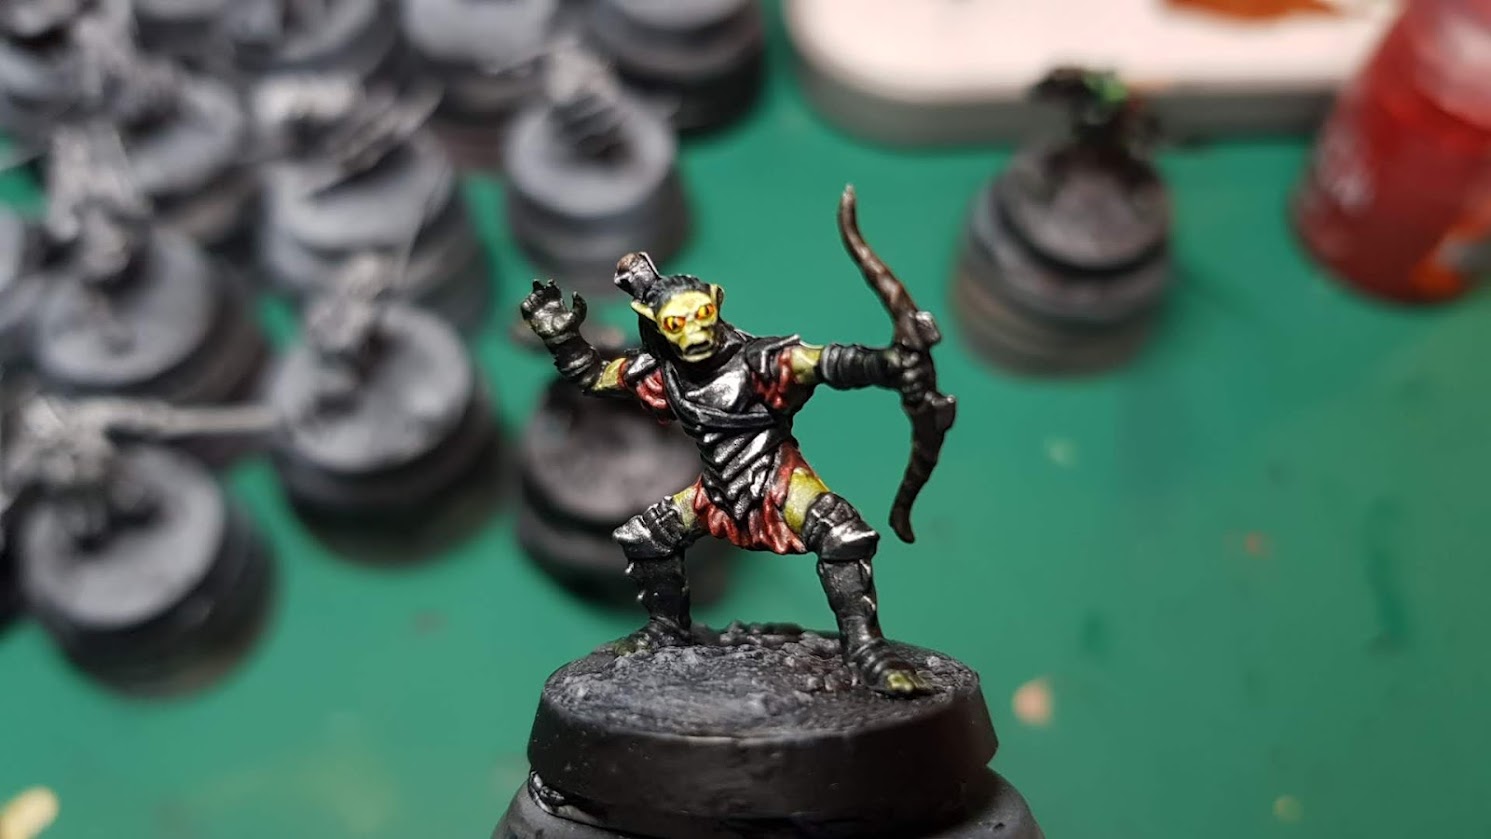
The metals have been painted with Vallejo Metal Color Steel, avoiding the recesses, which I wanted to keep dark and non-reflective. The eyes were painted with yellow, orange in the corners, and a cat-like slit of black for the pupil. After this photo I came back and highlighted all the red cloth on my goblins with orange to really make it pop.
The rest of the set were all painted in the same way: slapping on Contrast and washes and picking out highlights and metallics or special areas as necessary.
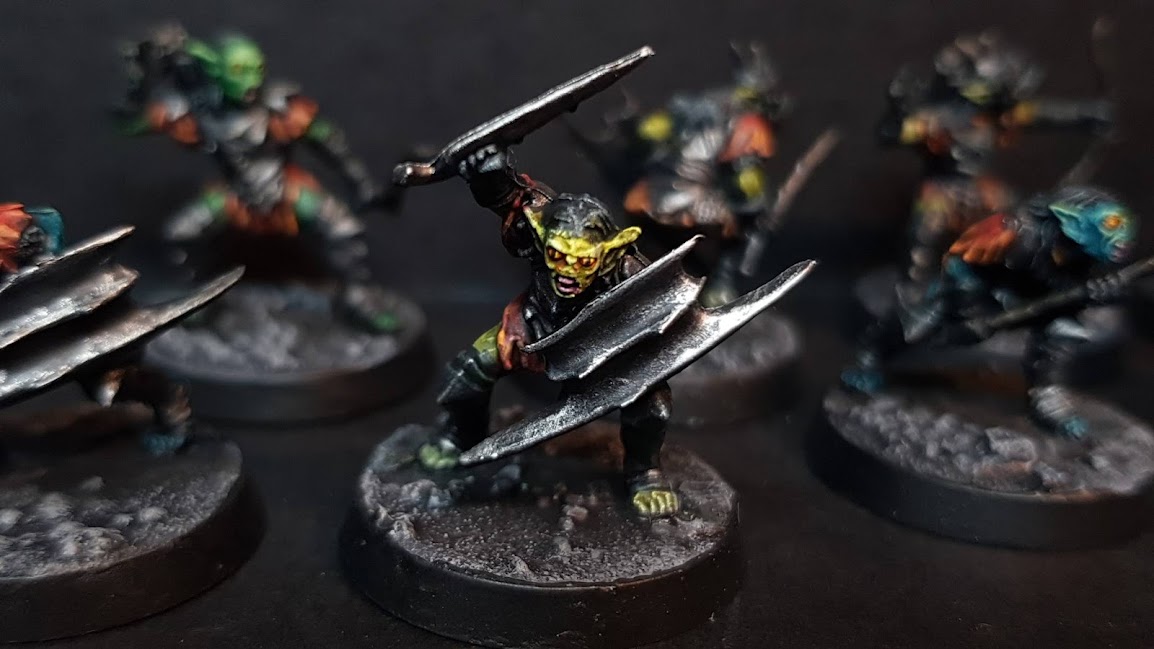
I’m particularly pleased with the all the eyes I managed to paint despite how tiny they are on these models. Sadly it’s hard to get a photo that shows the eyes well on anything other than the big-eyed goblins.
You may have noticed the One Ring model in the photos above. This comes on the Fellowship sprue, for some reason, and is used in the game as a turn tracker. I covered this in Vallejo Metal Color Gold and gloss varnish and called it done:

You can see some more photos on my Instagram of the Fellowship and the Goblins.
Playing
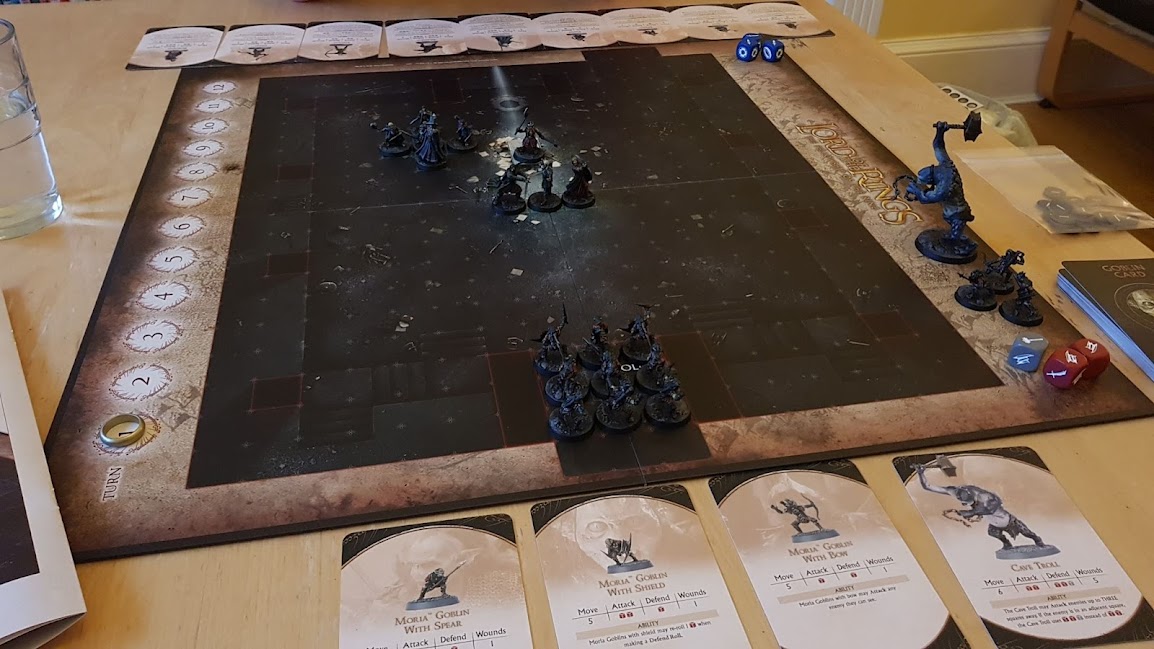
Not long after I’d finished painting the set, Nat and I set up the game to give it a go. She played the Fellowship and I played the Goblins. It’s a very simple ruleset, probably very kid-friendly, and definitely very fast, but not especially deep or tactically rewarding (this is a good thing!).
It seems to me that things don’t get interesting for the first 5 or so turns, as the Goblins really can’t get much work done when they’re only trickling into the Tomb in ones and twos and the Cave Troll hasn’t shown up yet.
Despite this it’s a pleasant way to spend the better part of an hour, humming the battle themes from the movies and quoting the various members of the Fellowship.
I lost, of course, but had fun doing so. I’d like to give it another go sometime, maybe having a go at playing the Fellowship or seeing what I could do differently as the Goblin player to make victory more likely.
-
PVA, paint, sand of various sizes, and talcum powder to bulk it up. ↩