Raycasting in Box2D
Filed Under: Programming


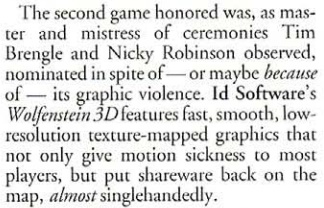
In this case, ‘raycasting’ refers to an old-school rendering algorithm used in early ‘pseudo-3D’ games such as Wolfenstein 3D. This tutorial provides a good overview of how it’s normally implemented in its simplest form: for each column of pixels on the screen. The world is represented as a 2D grid of integers in which the number 0 is empty space and anything else is a wall. Each ray iterates over the grid until it intersects a wall, whereupon you use the distance from the camera to the wall to draw a vertical line of pixels on the screen. Simple! Then you can add more on top, like texturing the walls and floor, ‘sprites’ which aren’t on the grid and always face the camera, etc.

(Reminder that I tend to add mouse-over text to my images.)
What if you want the freedom to have walls that aren’t grid-aligned, though? It’s easy enough to write functions which test for intersection between line segments (rays) and arbitrary polygons and circles, but when the number of objects in your world grows large, unless you want to raycast against every object in your scene hundreds of times each frame, you’re going to want to sort those objects into some kind of spatial partition. This will take a fair bit of your time, energy and sanity.
The good news is that Box2D already sorts every fixture (shape) in its world into a spatial partition. This is great because it saves us the effort of doing so, and gives us access to all the other cool stuff Box2D does. The b2World::RayCast function is fast and easy to use - so why not try using it to render the Box2D world from a first-person perspective?
Download the demo program (Windows only) from here. Controls are in the readme that should be included in the .zip or on the readme on the front page of the GitHub repo where you can view all the source code.
Next I’m going to add sprites. I think I’ve figured out how to do it in my head and just need to put my thoughts into code. The nice thing is that I should be able to render sprites in the same pass as I render the walls – in my old grid-based raycaster the walls are rendered and the sprites are handled afterwards. On the other hand, to handle partially-transparent sprites (and walls) I’ll have to continue rays beyond their first intersection-point, which complicates things somewhat.
Texturing the walls is going to take more time to solve. On a grid it’s easy to figure out how far along the wall the ray intersection-point is, here not so much. I’m going to be doing a lot of head-scratching, and I fear the solution I come up with in the end will be sub-optimal. Won’t know until I try, though!
The images below demonstrate the difference made by calculating the ray direction and intersection-point distance in different ways. If I were going to explain this here I’d want to use some diagrams. Maybe later, huh?


Further reading:
The 108th issue of Computer Gaming World from July 1993, featuring this quote about the 7th Game Developer’s Conference, is pretty cool to read: